How to Print via the Network Printer
A. Via the USB Flash Drive
Use the USB type-c adapter we provided to connect the USB flash drive for your data export. Click “History” and long press to select the record you want to export. Click "PDF", then the history data will be exported to your USB as PDF files. Insert the USB drive into your computer and print out reports.
B. Via Wi-Fi Connection
1. Download and install the printer plug-in
Please click the link below to finish the plugin setup.
2. Wi-Fi Connection
a. Turn on Wi-Fi setting on the monitor. Click "Setup"—"More"—"WiFi", then connect to the same Wi-Fi (no 5G) with the computer and network printer.
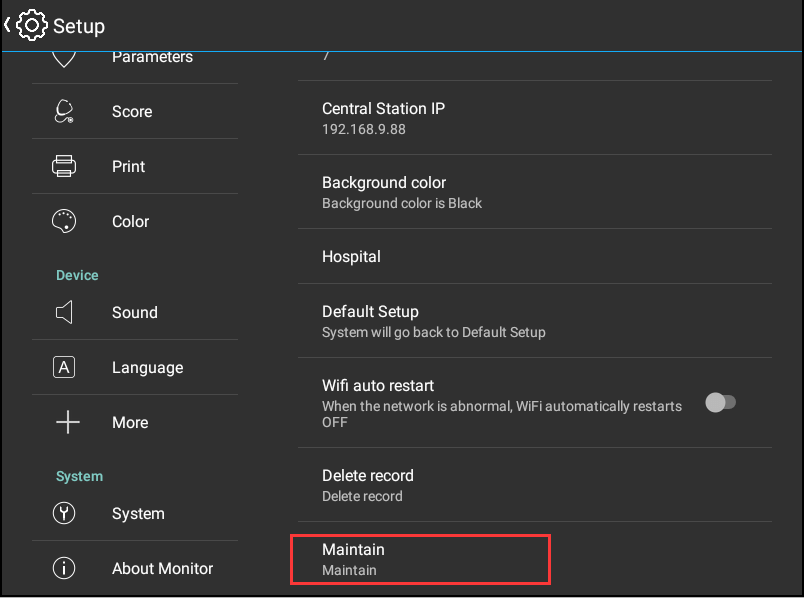
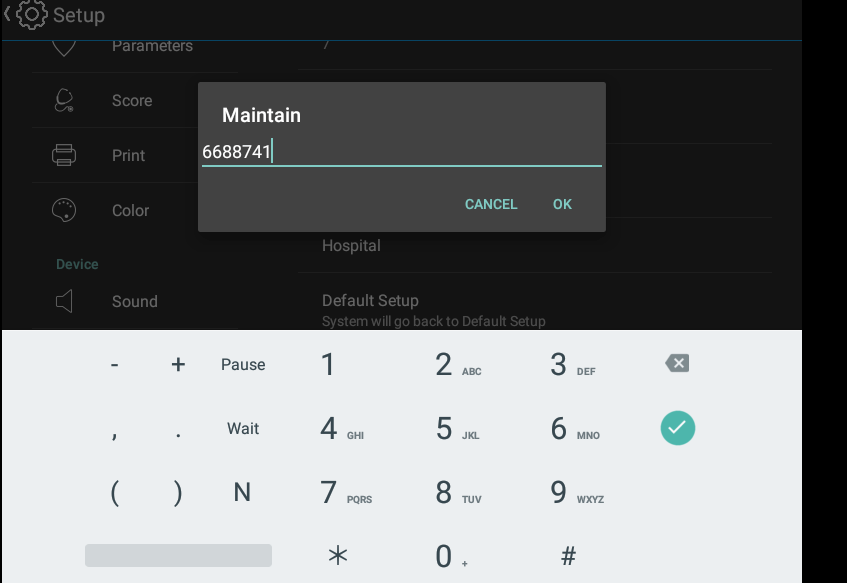
b. Select printer type on the monitor. Click "Setup"—"System"—"Maintain"—Enter password: 26833601, then select network printer.
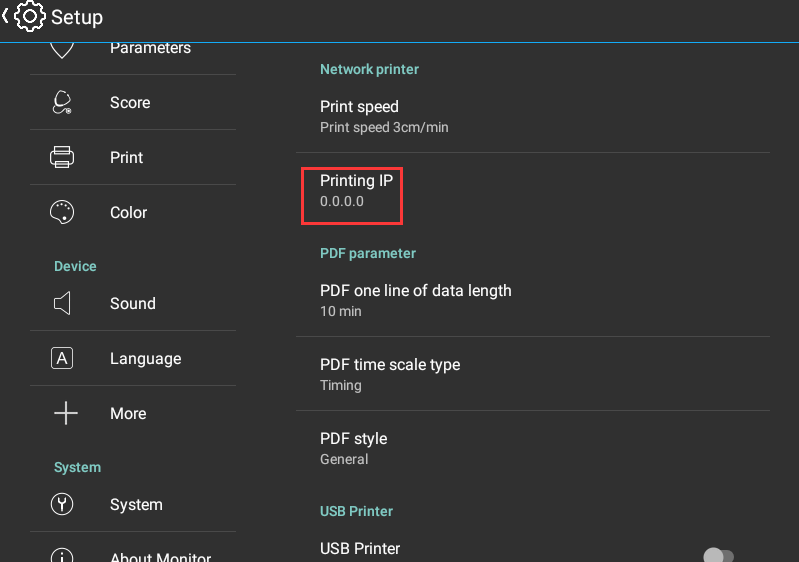
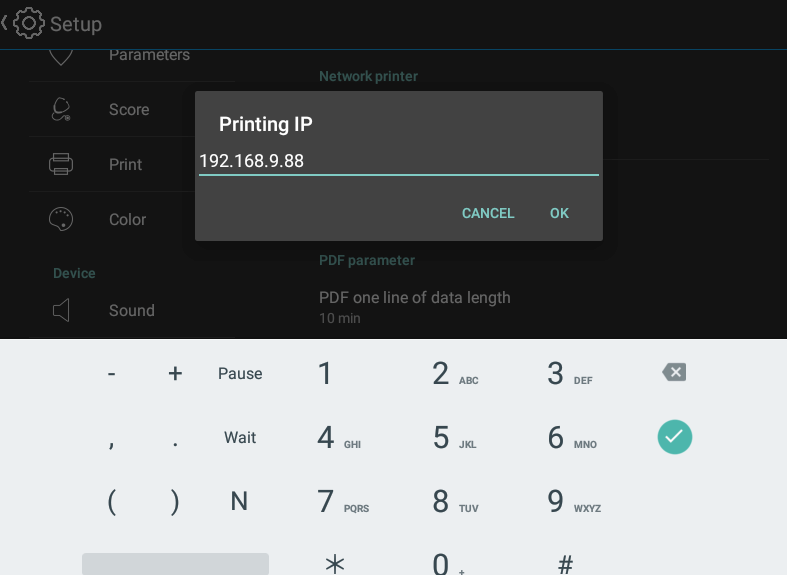
c. Input IP address: Click "Setup"—"Print"—"Printing", then input the same IP address with the computer and network printer.
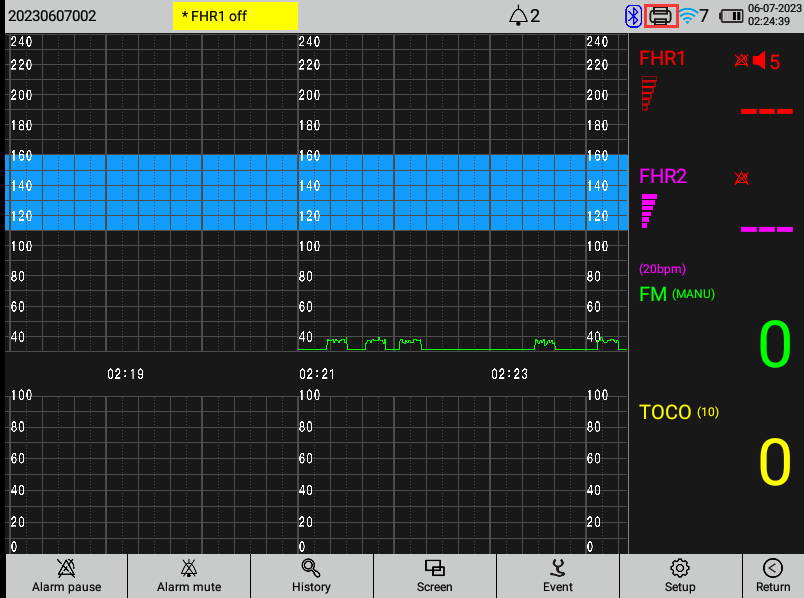
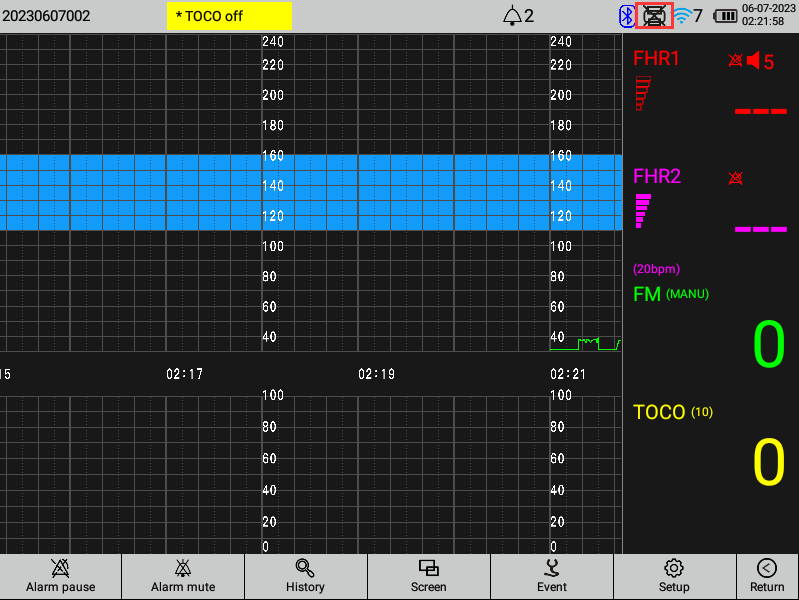
d. Restart the monitor. If the printer icon is shown in the figure below, it means it has not been connected yet.
e. Double click on the computer printer plugin icon. A new icon will appear in the bottom right corner of the computer.
f. Check the printer icon, if it appears in the upper right corner of the monitor, the printer plug-in is now connected.